
 90 Day’s To Better Zzz’s Guarantee T&C apply

How to Install an Earthing Rod Kit: UK Complete Guide
Could the most effective way to upgrade your sleep quality actually involve a simple piece of stainless steel driven into your garden soil? Whilst most people start their journey using a standard UK plug, many soon wonder if they could achieve an even purer connection by bypassing the house wiring entirely. We often hear from customers who are eager to try this gold standard of grounding but feel held back by a few practical worries. You might be anxious about accidentally hitting an underground cable or feel hesitant about the idea of drilling through your window frames. We understand those concerns completely; safety and peace of mind are just as important as the conductivity itself.
In this guide, we’ll walk you through exactly how to install a grounding rod kit to ensure you get the best possible results from your Sleep Earthed bedding. We’ll show you that the process is much simpler than it sounds, even with the latest April 2026 updates to the UK wiring regulations in mind. You’ll learn how to select the perfect spot in your garden, manage the cabling without damaging your home, and finally achieve that high-conductivity connection for a truly restful night.
Key Takeaways
- Discover why a dedicated rod provides the “gold standard” of earthing by bypassing your home’s electrical circuitry and avoiding “dirty electricity”.
- Master how to install a grounding rod kit by choosing a damp, garden-friendly location that naturally optimises conductivity for your Sleep Earthed bedding.
- Learn the practical steps for driving the rod into the soil and routing the cable through window seals without any permanent damage or drilling.
- Identify the essential tools and soil conditions needed to ensure your setup is safe, effective, and compliant with the latest UK standards.
- Understand how to use a Sleep Earthed Test Meter to gain complete peace of mind that your system is delivering a high-conductivity connection.
Why Choose a Dedicated Grounding Rod Kit for Your Earthing Sheets?
Many of our customers start their journey with a standard UK earth plug. It’s a brilliant way to begin because it’s simple and works with any standard socket. However, as you become more familiar with the benefits of earthing, you might start looking for ways to refine your setup. This is where the Grounding Rod Kit comes in. By moving the connection outside, you’re essentially opting for the "purer" version of earthing. It’s about more than just conductivity; it’s about ensuring the connection you’re getting is as free from interference as possible.
When you research how to install a grounding rod kit, you’ll find that the primary reason people make the switch is to avoid "dirty electricity". This term refers to the electromagnetic interference created by modern appliances, LED bulbs, and smart devices that can travel along your home’s internal wiring. While a plug is perfectly safe, it’s still part of a complex grid. A rod gives you a private line straight to the earth, ensuring your sleep environment remains as natural as possible.
Grounding Rod vs. UK Earth Plug
The choice often depends on your specific living situation. If you live in a high-rise flat, a plug is your only real option. But if you have access to a small patch of garden or even a flower bed, a rod is often the preferred choice. The UK electrical earthing system in older homes can sometimes be less than ideal. In some vintage properties, the earthing might not be as effective as it should be, making a dedicated rod a much more reliable solution for your Sleep Earthed sheets. Learning how to install a grounding rod kit is particularly useful for those living in these older properties, as it provides a guaranteed path to ground that doesn’t rely on old wiring.
The Purity of a Natural Connection
Bypassing your household circuitry means you aren’t sharing a connection with your fridge, television, or microwave. This allows for a more natural flow of electrons from the ground to your body. Our Sleep Earthed silver-threaded bedding is crafted to be highly conductive, and pairing it with a direct garden connection maximises its potential. There is also a significant peace of mind that comes with this setup. Knowing that you are physically connected to the soil just outside your window creates a powerful psychological link to nature. This helps you drift off into a deeper, more restorative sleep, confident that your system is performing at its absolute peak.
Preparing for Installation: Tools, Site Selection, and UK Soil Types
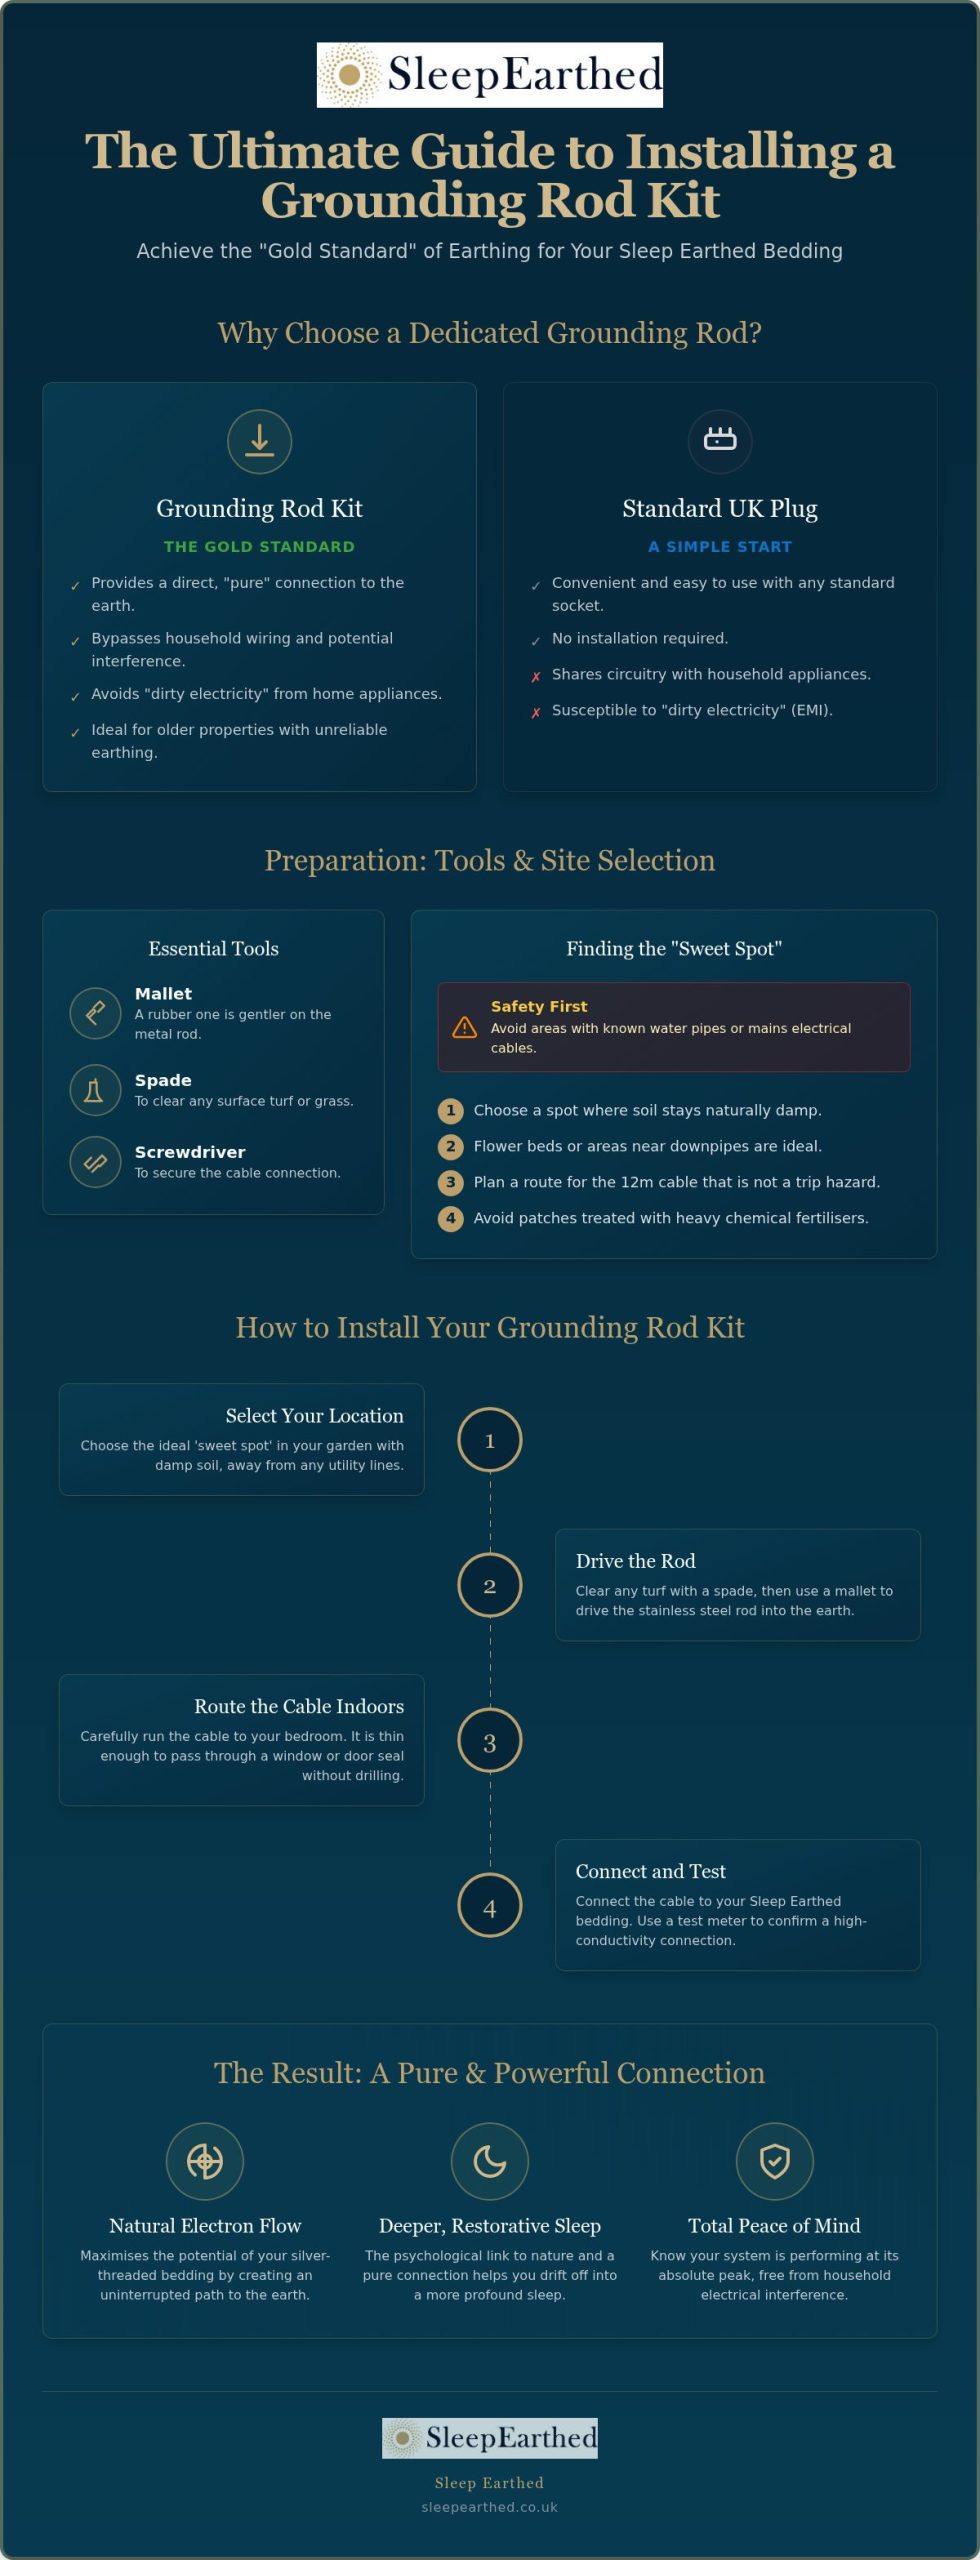
Before you begin, you will be pleased to know that you don’t need a van full of heavy machinery to get started. Most of the bits you need are likely already tucked away in your garden shed. When you are planning how to install a grounding rod kit, the first step is simply gathering a few basic tools: a mallet (a rubber one is gentler on the metal), a spade to clear any surface turf, and a small screwdriver to secure the cable connection once the rod is in place.
Safety is always our first priority. Before you push anything into the earth, take a moment to look around your property. You must avoid areas where you know water pipes or mains electrical cables enter your home. Generally, these run in straight lines from the street or external meters. If you are at all unsure, it’s always better to pick a spot a bit further away in a flower bed where you’ve previously dug without issue. A little bit of caution now ensures a stress-free setup later. Remember the 12m cable plus the 4m earth wire is what you have to work with, so choose a spot which will still enable you to reach your bedsheet easily.
Finding the "Sweet Spot" in Your Garden
The best location is one where the soil stays naturally damp. Flower beds are often the ideal choice because they are usually watered regularly and the soil is softer. Areas near downpipes or under a roof drip line are also excellent choices; the extra moisture in these spots helps the electrons flow more freely.
Think about the distance to your bedroom too. Our Sleep Earthed kit comes with a generous 12m cable, but you will still want to plan a route that doesn’t create a trip hazard. Try to avoid areas treated with heavy chemical fertilisers, as these can eventually corrode the rod. A natural, "wilder" patch of the garden is often the perfect home for your new setup.
UK Soil and Conductivity
British gardens vary wildly from one county to the next. If you are in a heavy clay area, common in many parts of the UK, you will have fantastic conductivity because clay holds moisture so well. However, clay can be quite stubborn. In these cases, making a small pilot hole with a long screwdriver first can make driving the rod in much easier.
If your soil is sandy or very stony, moisture drains away quickly, which can reduce the effectiveness of the earth connection. During a rare British heatwave, you might even find the soil around the rod dries out completely. A quick tip from our team: if the ground is parched, give the area around your rod a little water when you are doing the plants. This keeps the connection strong and your sleep quality high. If you are ready to start your journey, our Grounding Rod Kit includes the essential components to get you connected to the earth safely and effectively.
Step-by-Step Guide: How to Install Your Grounding Rod Kit Safely
Opening your Sleep Earthed kit is the first real step toward a purer grounding connection. Inside the box, you’ll find our custom-designed 30cm stainless steel rod and a generous 12m extension cable. We’ve chosen stainless steel because it’s incredibly durable and won’t rust away in damp British soil like cheaper alternatives might. Before you head out to the garden, just take a second to familiarise yourself with these components. It’s a straightforward setup, but getting the details right ensures your system remains effective for years to come. Many people find that understanding how to install a grounding rod kit is much less daunting once they see how high-quality and simple the parts actually are.
Driving the Rod into the Ground
If you’ve discovered that your garden soil is particularly hard-baked, especially during the summer months, don’t try to force the rod in with sheer power. We recommend the "pour and wait" method. Simply pour a jug of water over your selected spot and give it ten minutes to soak in. This softens the earth and makes the installation much smoother. When you’re ready, use a rubber mallet to drive the rod into the ground. We prefer a mallet over a heavy hammer because it protects the head of the rod from "mushrooming" or bending. You want the top of the rod to be flush with the soil surface or even a centimetre below. This keeps it safe from lawnmowers and wandering feet whilst maintaining a solid connection with the earth’s electrons.
Connecting the Earthing Lead
With the rod in place, you can now attach the lead wire. Slip the terminal onto the rod and use your screwdriver to tighten the screw until it’s nice and snug. In this context, conductivity is the measure of how easily the natural energy from the earth travels through the physical join between the rod and your lead wire. If the connection is loose, the flow is restricted. Once you’re happy with the tightness, it’s a smart move to protect the join from the elements. A quick wrap of waterproof electrical tape or a dab of silicone sealant will prevent oxidation. This ensures that moisture doesn’t cause the metal to tarnish, which would otherwise create a layer of resistance over time. By following these steps for how to install a grounding rod kit, you’ve created a permanent, high-performance link for your Sleep Earthed bedding.
Routing the Cable: Bringing the Earth Connection Into Your Bedroom
Once you have successfully driven your rod into the garden, the next logical step is figuring out how to get that 12m cable into your bedroom without it looking like a building site. Many of our customers feel a bit stuck here, but there are several clever ways to do this that don’t involve calling out a builder. Planning your route is essential. Start at the rod and follow the line of your house, perhaps tucking the wire behind a downpipe or along the top of a flower bed. This keeps it out of the way of the lawnmower and prevents any nasty trips when you’re out hanging the washing.
Learning how to install a grounding rod kit involves more than just the garden work; it’s about making sure the cable entry is neat and safe. You want a path that is secure but doesn’t pinch the wire, as a damaged lead will quickly reduce the effectiveness of your Sleep Earthed sheets. Take your time to walk the route before you start clipping anything down to ensure you have enough slack to reach your bedside comfortably. If you’re new to setting up earthing bedding and want a broader overview of the process, our grounding sheet setup guide covers everything from verifying your home’s wiring to connecting your silver-threaded sheets safely.
The Window Seal Method
For those in rented accommodation or anyone who simply doesn’t want to drill through their walls, the window is your best friend. Most modern UK UPVC windows have small weep holes at the bottom of the frame to let condensation out. These are often just the right size to thread our thin lead through. Alternatively, you can simply run the wire over the window seal. Because the cable is quite fine, most window seals will simply compress around it, keeping the room weather-tight. Just be careful not to slam the window shut on the wire; a gentle close is all it needs to stay secure whilst keeping the drafts out.
Permanent Wall Installation
When you are looking at how to install a grounding rod kit, you’ll find that drilling a small hole through the wall is a straightforward DIY task for a more permanent look. You’ll need a masonry drill bit, usually around 8mm to 10mm. A crucial tip for the British climate is to create a drip loop. This means letting the wire hang slightly lower than the entry hole before it goes inside. This way, rain runs down the wire and drops off the bottom of the loop rather than being funnelled into your brickwork. Once the wire is through, a small squeeze of clear silicone sealant around the hole will keep your home insulated and your bedroom cosy. If you’re ready to upgrade your setup, you can order your Grounding Rod Kit here to get started.
Testing and Maintaining Your Grounding Connection for Peak Performance
Once you’ve completed the physical work of driving the rod and routing the cable, you might feel like the job is done. However, knowing how to install a grounding rod kit properly also involves verifying that the connection is actually delivering those lovely electrons to your bed. Unlike a lamp that either turns on or stays off, an earthing connection is invisible. You can’t see the energy flow, so testing is the only way to gain absolute peace of mind that your setup is performing as it should. We always recommend a quick check to ensure your Sleep Earthed bedding is fully active before you settle down for the night.
Using the Sleep Earthed Test Meter
Our Sleep Earthed Test Meter is a simple, handheld device designed specifically for this purpose. To use it, simply touch the probes to the surface of your silver-threaded sheet whilst the grounding rod is connected. If the meter indicates a strong connection, you’re all set for a restful night. If the reading feels weak or inconsistent, it’s time for some quick troubleshooting. Often, a "poor" reading is simply due to the soil in your garden becoming too dry, which we mentioned earlier can be fixed with a quick splash of water. Alternatively, check that the connection to the rod hasn’t vibrated loose over time. Understanding these small details is a key part of mastering how to install a grounding rod kit for long-term success.
Long-term Maintenance Tips
British weather can be quite unpredictable, and your outdoor equipment needs to stand up to everything from frost to heatwaves. Every few months, especially after a particularly harsh winter, take a wander out to the garden to inspect the rod. Check that the soil hasn’t shifted and that the connection point remains clean and free from debris or overgrown plants. If you notice any green oxidation on the metal, a quick rub with a bit of sandpaper will restore the conductivity instantly. While our stainless steel rods are incredibly hardy, you should also inspect the lead wire for any signs of brittle casing or fraying every few years to ensure the path remains clear.
Inside the home, the maintenance is even simpler. Your Sleep Earthed sheets contain silver threads, which can occasionally be affected by natural body oils or lotions. Regular washing is actually good for the sheets, as it prevents these oils from building up and insulating the silver threads. Just remember to avoid bleach or fabric softeners, as these can coat the silver and block the connection. For full guidance on keeping your bedding in peak condition, our complete guide on how to wash grounding sheets explains exactly which detergents, temperatures, and techniques will protect the silver fibres without reducing conductivity. By keeping the threads clean and the outdoor connections tight, your grounding system will continue to support your sleep for many years to come.
Ready to Experience the Purest Earth Connection?
Taking the step to bypass your home’s internal wiring is one of the most effective ways to refine your earthing practice. You’ve seen that the process of how to install a grounding rod kit isn’t nearly as complex as it first appears. From choosing a damp spot in your garden to routing the cable through a window seal, these simple actions lead to a high-conductivity setup that works in harmony with the natural environment. By following our guide, you’ve ensured your system is safe, weather-protected, and ready to deliver a restorative night’s rest.
Our Grounding Rod Kit is manufactured in the UK for guaranteed quality and is designed to be fully compatible with all Sleep Earthed silver-threaded bedding. We want you to feel entirely confident in your choice, which is why our systems are backed by a 90-day better-sleep guarantee. If you’re ready to upgrade your sleep environment and leave "dirty electricity" behind, order your Sleep Earthed Grounding Rod Kit today. We look forward to helping you achieve the most natural connection possible. Happy grounding!
Frequently Asked Questions
Do I need an electrician to install a grounding rod kit?
You don’t need a professional electrician to install our kit. Since this is a functional earth for your Sleep Earthed bedding rather than a mains electrical installation, it’s a perfectly safe and simple DIY project. The process involves driving a rod into the soil and routing a low-voltage cable. It doesn’t touch your home’s 230V power supply. If you’re comfortable with basic garden tools and routing a wire, you can easily manage the setup yourself.
How deep does a grounding rod need to go for earthing sheets?
Our Sleep Earthed grounding rod is 30cm long and should be driven fully into the earth. You want the head of the rod to be above surface to attach the connector to it. This depth is ideal for wellness applications as it reaches the moist, conductive layers of UK soil without the need for the heavy industrial equipment required for 8-foot deep utility rods. It’s effective, safe, and manageable for most British gardens.
Can I use a grounding rod if I live in a second-storey bedroom?
Yes, you certainly can. Our kit includes a 12m extension cable specifically to help those in upstairs bedrooms reach the ground. You just need a clear path for the wire to travel down the outside of your house. Many customers find that routing the lead through a first-floor window or along a downpipe is the easiest way to learn how to install a grounding rod kit when sleeping on a higher floor.
What happens if lightning strikes near my grounding rod?
It’s a common worry, but our grounding rods don’t attract lightning. They are much too short and sit too low to the ground to act as a lightning conductor. In the very unlikely event of a nearby strike, the thin lead wire would act like a fuse and melt, instantly breaking the connection to your bed. Your safety is paramount, and these systems are designed with these natural occurrences in mind.
Will the grounding rod kit work in very dry or sandy soil?
It will still work, but dry or sandy soil is naturally less conductive than damp clay. If your garden is particularly parched, you might notice a weaker connection on your Sleep Earthed Test Meter. A simple fix is to water the area around the rod occasionally. This maintains the moisture levels required for an efficient electron flow, ensuring your Sleep Earthed sheets continue to perform at their best even during a dry spell.
How often should I test my grounding rod connection?
We recommend testing your connection once every few months or whenever there’s a significant change in the weather. Using a Sleep Earthed Test Meter takes just a few seconds and gives you total peace of mind. Regular checks are a vital part of knowing how to install a grounding rod kit for the long term. It helps you spot loose terminals or dry soil before it affects your sleep quality.